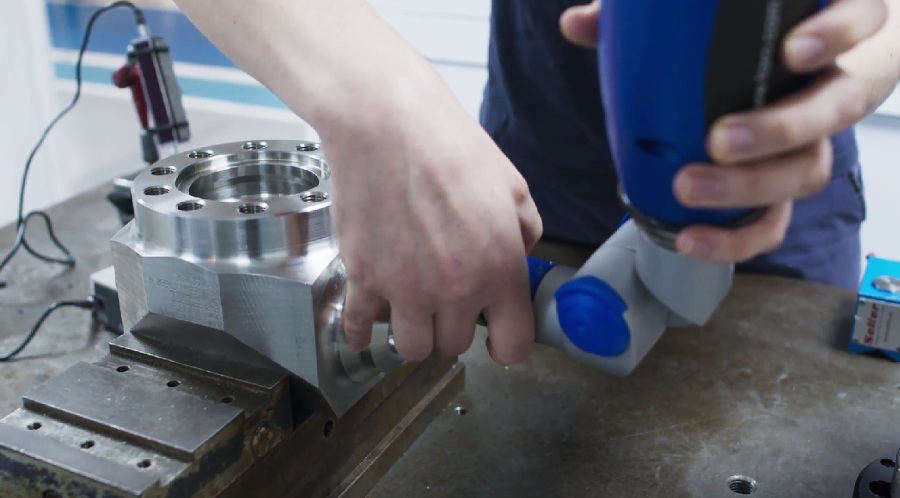
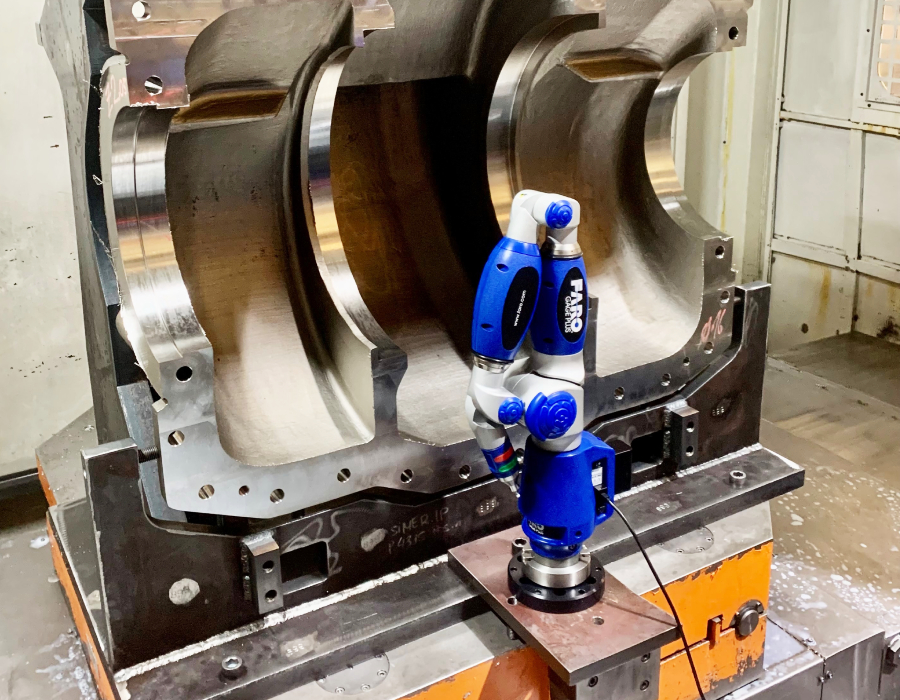
The Measuring arm is a measuring device that has proved to be extremely appreciated by the engineering industry. It is essential for assessing precision in the manufacturing of critical components, such as industrial valves, highlighting among them, needle control valves thus ensuring their exceptional quality and performance. It is a portable articulated Coordinate Measuring arm (CMM) that provides easy verification of the quality of the product concerning its dimensions and tolerances. Metrologists evaluate the precision of the arm from the calibration process, obtaining results reliable, being compared to existing ISO standards. This tool is known for its versatile nature due to multi-axis rotations, which allow the machine to make free movements.
The Industry 4.0 has set a milestone in the accuracy and efficiency of the measuring arm at Asimer Group. This precision electronic measuring device, crucial for assessing quality in industrial production, has become even more accurate and efficient thanks to the CNC machining revolution. CNC machining ensures the crafting of each component of the measuring arm with the utmost precision, thereby contributing to precise and reliable measurements.
It is essential to highlight how energy efficiency in industrial valves can have a significant impact on measurement accuracy. Energy efficiency in these valves, when applied in measuring equipment, not only reduces energy consumption but also ensures a constant and stable fluid flow, avoiding fluctuations that could negatively affect measurement accuracy. Therefore, understanding and promoting energy efficiency in the valves used in these devices becomes an essential element in maintaining precision and reliability in measurements, contributing to a more robust and efficient quality control in various industrial applications.
What does this device provide us?
CAD-based inspection
The Faro arm allows us to measure geometric dimensions and tolerances, being a way to compare the 3D design to the real product. This allows us retouches, adaptations and sometimes major redesigns to create the best product.
Dimensional analysis
This measuring machine can capture all measurements of a complex part with high precision. In addition, it has very accurate portable CMM digitizing arms that allow to carry out metrology and 3D dimensional analysis, simplifying the study of any phenomenon in which many physical magnitudes are involved in the form of independent variables.
Prototype inspection
Portable measuring arms (as our Faro Arm) are available to quickly capture prototype surface dimensions as well as geometric features. This creates a digital record to ensure quality control.
In process of inspection
This innovative product can check and inspect individual parts while they are in process and without removing them from the machine where they are fixed for machining (metal removal process) . Therefore, the intermediate inspection during the mechanical manufacturing processes ensures its final dimensional quality.

Reverse engineering
Reverse engineering pursues the goal of obtaining as much technical information as possible about a product, for which there is not the slightest technical information about its design, construction and working, so that it is necessary to start from a whole to understand each piece of the product, for which very detailed notes must be taken.
Therefore, it is used to discover the technological principles of a system, based on its structure and operation, over a system already created.
In the Industrial Engineering sector, Reverse Engineering is also widely used, since it provides us multiple functions that can be used to improve products, or just modify them.
A fundamental tool is the scanning of pieces, which allows us to obtain the shape of a part or physical system in CAD, and from that point, to be able to work on it.
Fortunately, this device provides what is known as a “reverse engineering” a option that allows you to scan the surface of a particular product, to create a fully functional and extremely detailed computer-aided design.
Machine calibration
Calibration means using a measurement standard to determine the relationship between the value displayed by the measuring instrument and the true value. The reliability of a measuring instrument can be guaranteed by calibrating it according to a measurement standard.
If the individual components of a machine are not calibrated to work simultaneously, this can create problems and reduce the efficiency.This instrument can compare and contrast the tolerance between individual parts and highlight areas of uncertainty.
Alignment
Just like the calibration of individual components within a product, the alignment of these individual components is vital to its operation. The ability to use laser trackers within the measurement arm will alert operators to any potential problems long before they become a bigger problem.
Tools Construction and configuration
The set of measuring devices of this instrument ensures that all final products are obtained with exact dimensions. It is this high degree of accuracy that is required especially when products are manufactured in large quantities, and/or with critical dimensional tolerances. It is crucial to continually measure the volume of serialized products, the location of individual tools, and the impact that has in the manufacturing process.
Measuring Arm at Asimer Group
Being a precision electronic measuring device designed for use in industrial environments, at Asimer Group, the inspection of our final products is a critical process to ensure the quality standards demanded by our customers. The measuring arm allows us to quickly and easily verify the product’s quality. With this instrument present in our metrology room, we can perform 3D inspections, CAD comparisons, dimensional analysis, and reverse engineering of complex alloy components.
In an environment where precision is everything, every tool that helps us evaluate and maintain quality standards is invaluable. Measurement arms have become indispensable allies in the CNC machining industry. By linking this article with “Chip Removal Machining in the CNC Era,” we can explore how these tools can be further integrated into optimization processes, ensuring ever-greater precision in production.
To enhance its performance, it is imperative to have a quality infrastructure. In this regard, the Trevisan Machining Center stands out by offering cutting-edge equipment that facilitates the maintenance and calibration of the measuring arm, thus guaranteeing precise and reliable measurements. This translates to increased efficiency in metrology operations and, ultimately, an enhancement in product quality. This device can measure circularity, concentricity, cylindricity, flatness, parallelism, perpendicularity, true position, and straightness. We obtain extremely comprehensive reports that show which dimensions are within and outside tolerance and to what extent, allowing us to tailor our services to our clients’ specific needs.
Remember that Asimer Group is dedicated to the development of engineering projects and the machining and welding of all types of industrial pumps and valves like diaphragm valves, butterfly valves or axial flow check valves.


